When you have a sales email that gets a lot of responses from leads and customers, you can use the auto-forwarding option in your email inbox to forward these emails to your CRM. Consolidating your sales interactions in your CRM will improve your sales team’s accessibility to follow up on deals and understand customer feedback better, without navigating between your email inbox and CRM. Distributed Source’s Inbound Email feature lets you import interactions into your CRM automatically.
Adding your email address in Distributed Source
It is important to add your email address in Distributed Source to start importing emails from your inbox.
- Log in to your Distributed Source account.
- Click the profile icon in the top-right corner and choose Settings from the drop-down menu.

- Choose the Emails tab on the sidebar. By default, the email used while creating your account will be listed in the Email Addresses section under the Personal Emails & Inbound tab. You can include multiple email addresses manually by following the instructions mentioned here.
Generating a forwarding address for your email
- Next, click the +Add Forwarding Address button.

- Emails associated with products that you have set in Distributed Source will be displayed in the drop-down list. Click the Generate button for the forwarding address and then click the copy icon next to the generated forwarding address.
Setting up auto forwarding in your email account
Now log in to your Gmail account to configure the auto-forwarding settings that will forward your emails to your Distributed Source account.
Note: If you are using any other email service provider, follow their instructions to set up email forwarding.
- From inside your Gmail inbox, click the gear icon on the top-right corner and choose Settings.
- Click on the Forwarding and POP/IMAP tab.
- In the Forwarding and POP/IMAP window, click on Add a forwarding address button, input the generated address that was copied from your Distributed Source account and click Next.

- In the next window, click the Proceed button to confirm the address where emails will be forwarded.

- An email containing the confirmation code will be sent to your Distributed Source account. Click on the Notification icon in your Distributed Source account to open that email and copy the confirmation code.

- Go back to the Forwarding and Pop/IMAP tab in your Gmail account. Input the copied code in the Forwarding section and click the verify button.

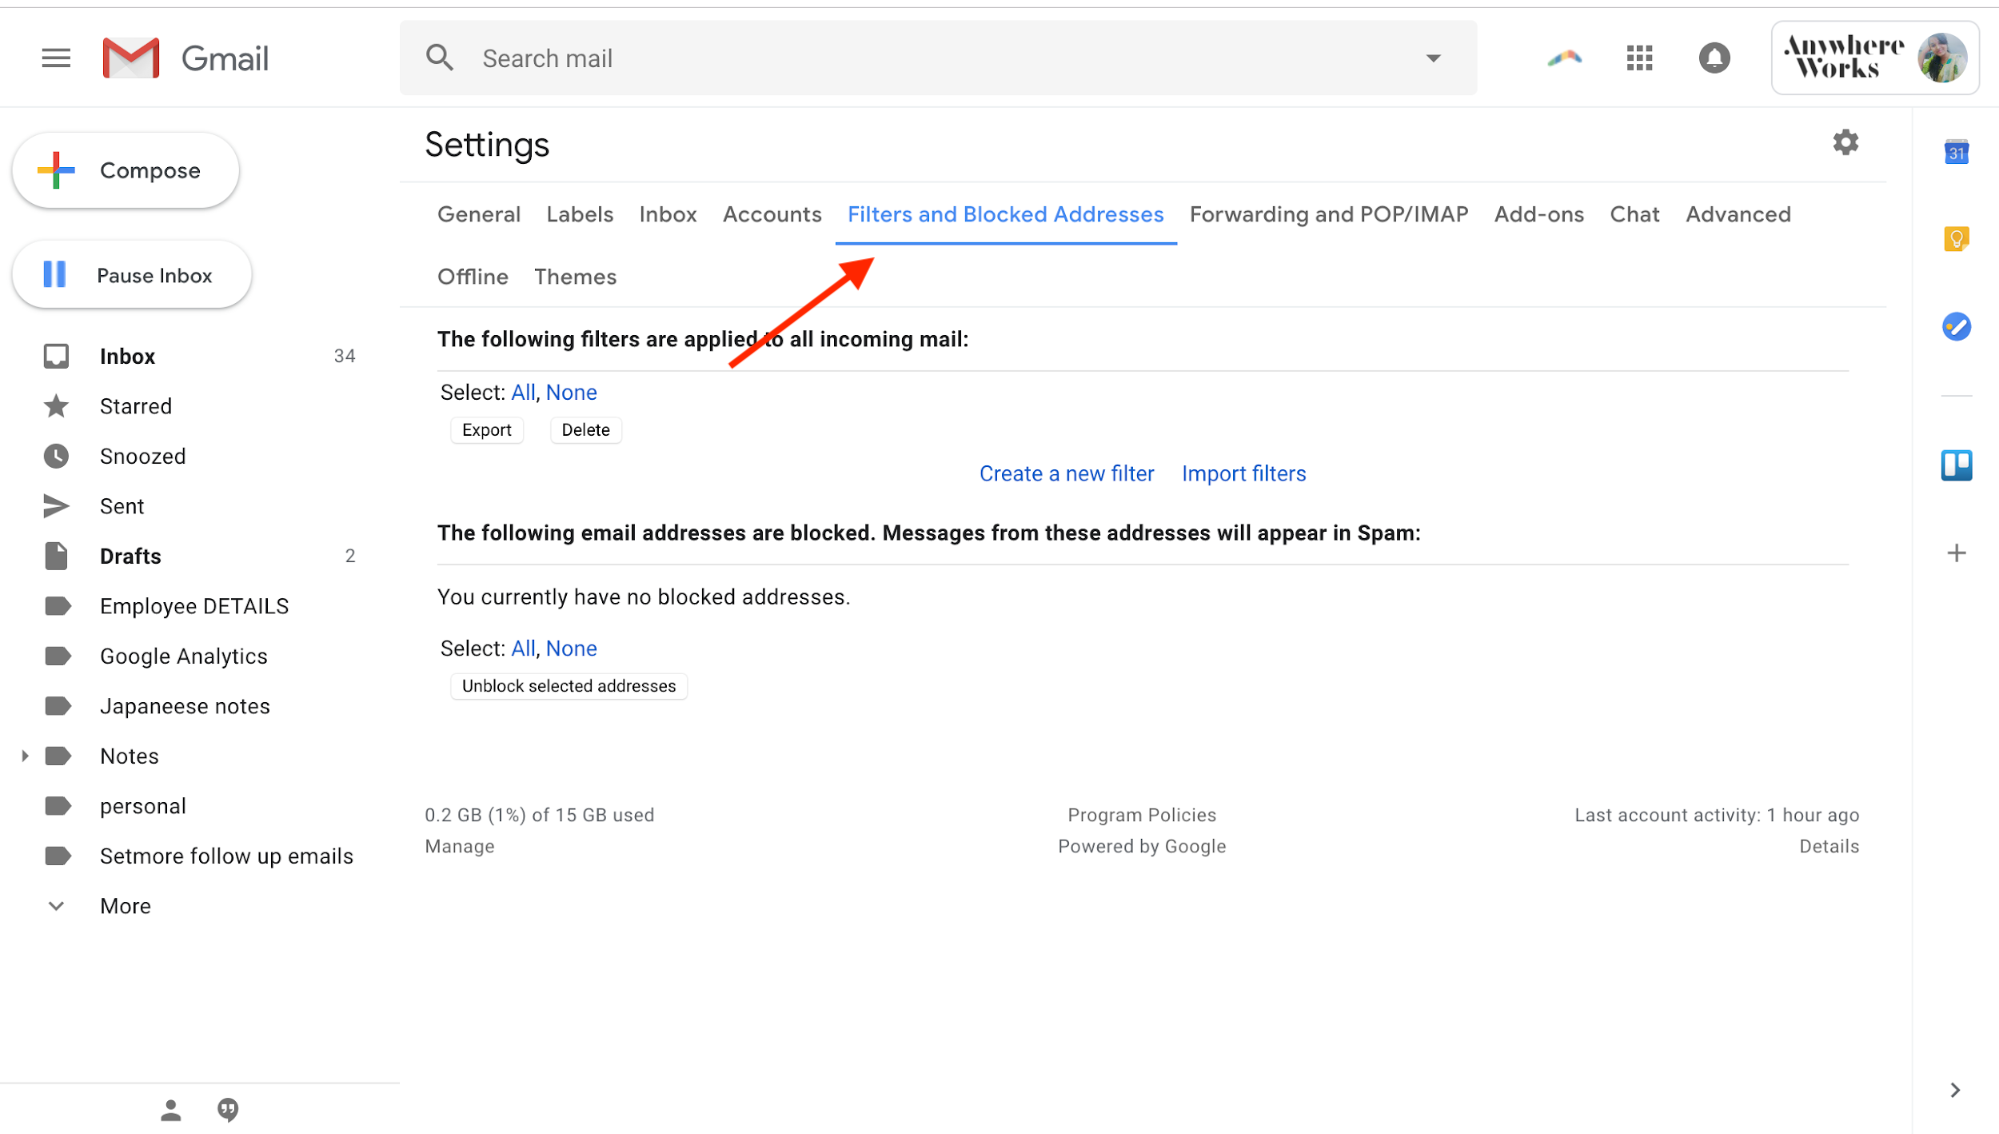
Creating a filter
- Now Click on the Create Filter button under Filters and Blocked Addresses tab.
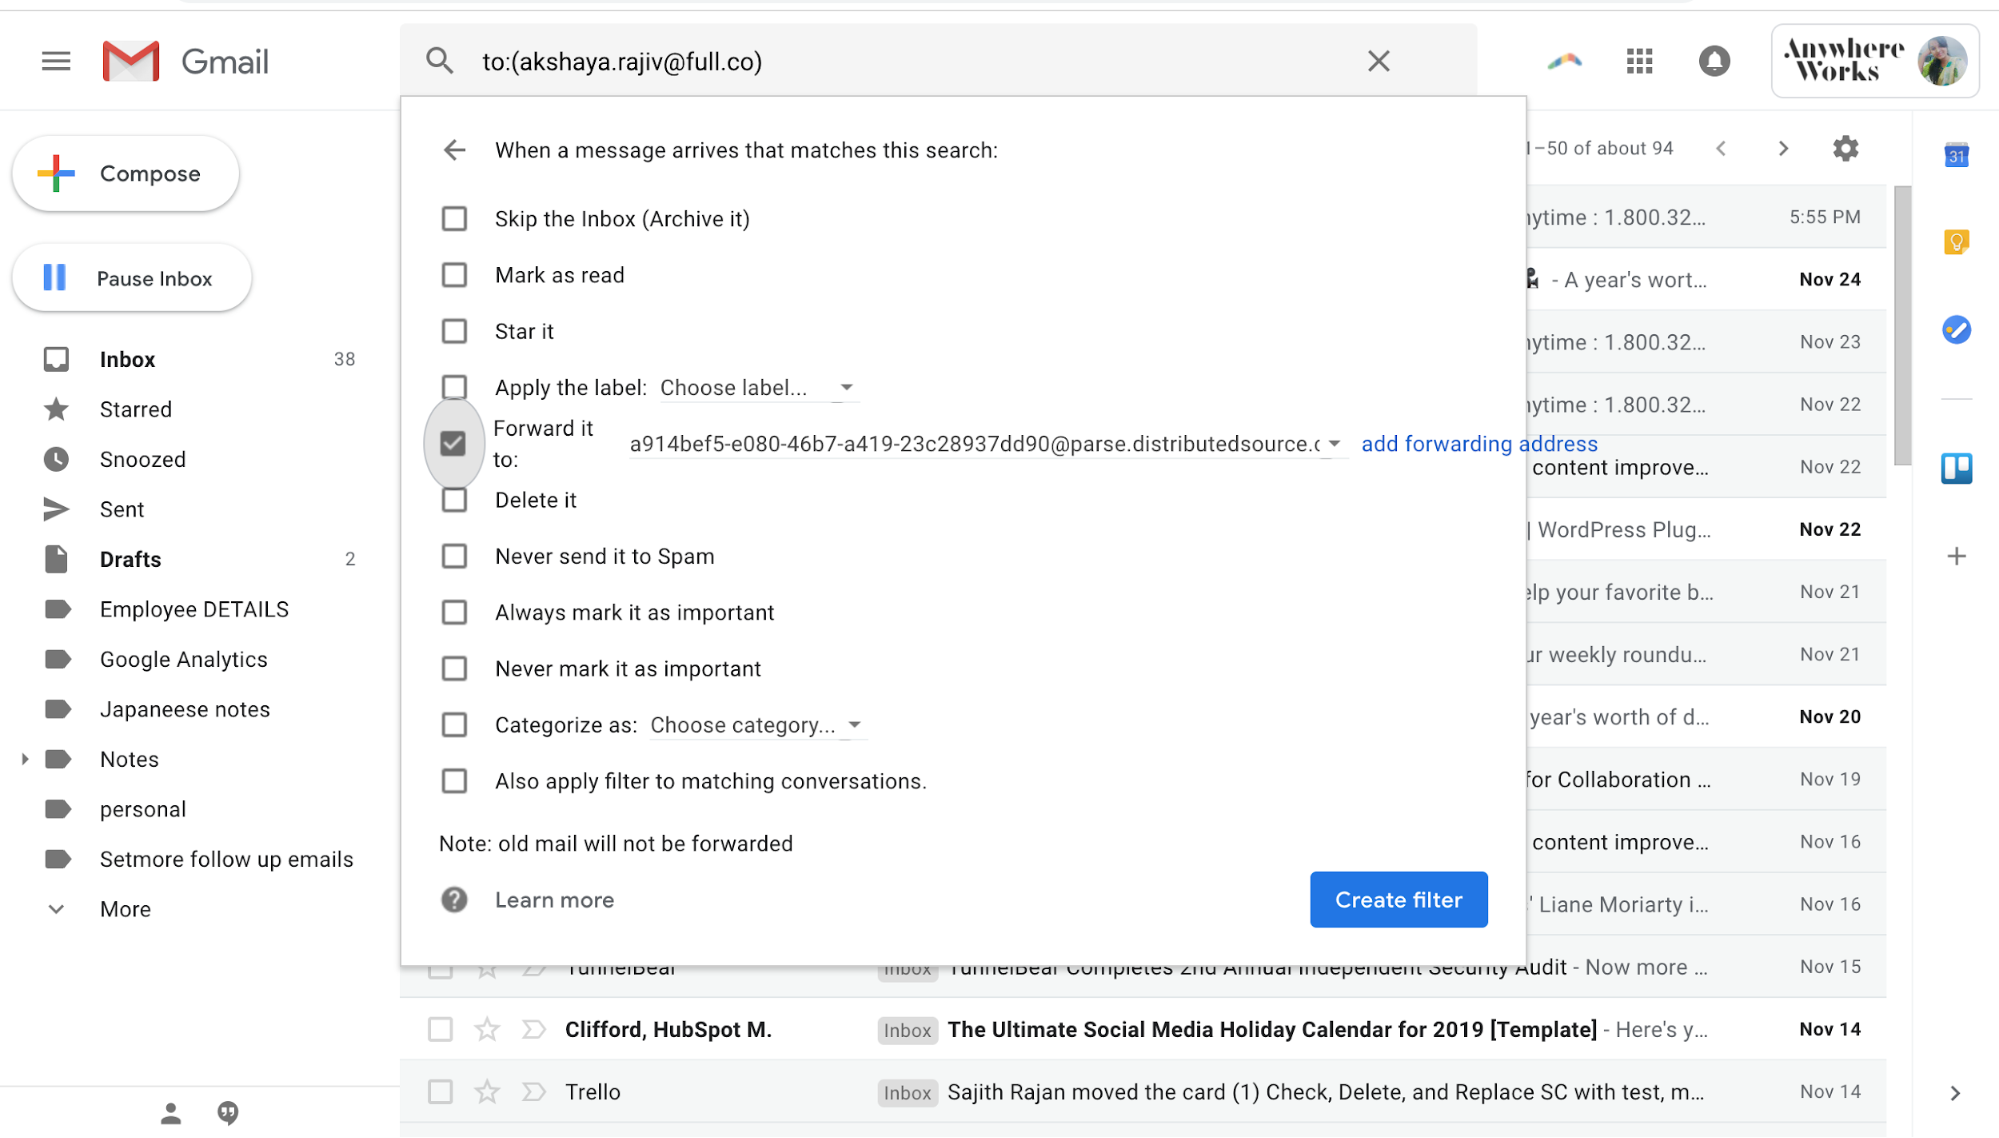
- Input your email address in “To” section and click on the Create Filter button.

- Next, check the “Forward it” option and select the forwarding address generated in your Distributed Source account from the drop-down list. Click on Create Filter to proceed.

- In the next window click the check-box next to your filter to enable the filter and automatically forward all your inbound emails from your email inbox to your Distributed Source account.